The name "Instructional Minutes" was chosen out of a list of educational terms. According to School Wise Press, instructional minutes "refers to the amount of time the state requires teachers to spend providing instruction in each subject area." In the case of our blog however, it is learning BEYOND the instructional hours (1.5 hours per subject per day). Hopefully, this will motivate students to spend more "minutes" for learning!
For those who have no or little experience on blogging, writing a blog entry can seem to be a intimidating task. This little tutorial is written for you.
1.
Blogger®
is a service of Google.com. If you do not yet have a Gmail account, please create one first so that the instructor can
add you as a blog author. This will enable you to write blog entries (but not
edit other people’s blog posts). After you have a Gmail account, you can now log-in to Blogger.
2.
In
order to write a new blog entry, click “New
Post” on the left part of your screen. You will be taken to a page which
resembles a word processor (like Microsoft Word or OpenOffice Writer). Alternately,
you can write your blog entry on a word processor and copy-and-paste it here.

3.
Do
not forget to write a title for your
blog entry. To help everyone look for your blog entry, place a “Label” on your blog entry. The blog
entries we will use are according to our subjects, for example, “Speech Comm”
or “Bible as Litt”.

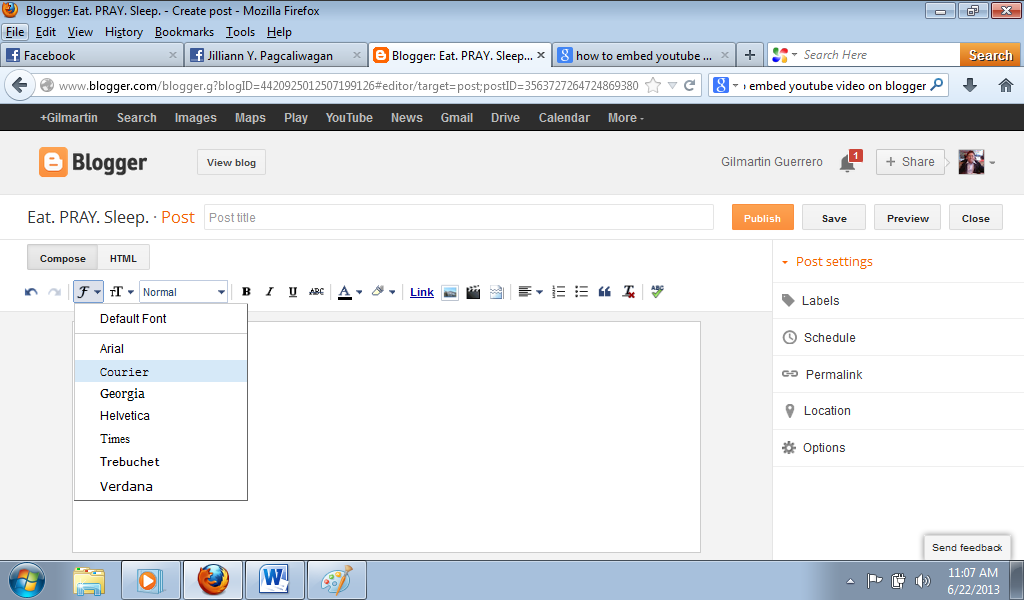
4.
For
uniformity, we will use Times New Roman
as our default font and “Normal” as
our size.
5.
To
insert hyperlinks, highlight the text then click “Link” on the bar on top.
Copy the URL (web address) of the website you want and paste it on the dialog
box. When a reader clicks on a word with a hyperlink, it will open the website
you selected.

6.
To
add pictures, DO NOT copy and paste pictures on the text itself. Click
the Insert Image icon (beside the Link button). Select “Choose files” and
browse your computer for the picture you want to upload. You can also click “From
a URL” to add pictures directly from the Internet. Make sure you tell us where you got the pictures!

7.
To
add videos from your phone or camera,
click the Insert Video icon (the one that looks like a clapper) and browse for
the video on your computer.
8.
To
embed videos from YouTube, go to the
video you want to embed, then click “Share” then “Embed”. Copy the code provided, which kind of looks like this:
On Blogger, click “HTML” on the top left (beside “Compose”). The editor will be filled with HTML code. Paste the embed code there.


An example is the following video on how Google Translate works:
<iframe
width="560" height="315"
src="http://www.youtube.com/embed/_GdSC1Z1Kzs"
frameborder="0" allowfullscreen></iframe>
On Blogger, click “HTML” on the top left (beside “Compose”). The editor will be filled with HTML code. Paste the embed code there.


An example is the following video on how Google Translate works:
Check if your work is neat by clicking "Preview" Finally, click "Publish" and voila! You have posted you blog entry!
I look forward to go on this exciting journey in e-Learning which is new to all of us. I hope that we will spend a lot of "instructional minutes" together. God bless!
No comments:
Post a Comment